从0到0.5:eBPF加速ServiceMesh实践

环境准备

Docker安装
安装依赖
1
2
sudo apt update
sudo apt install apt-transport-https ca-certificates curl gnupg-agent software-properties-common
导入存储库的GPG密钥
1
curl -fsSL https://download.docker.com/linux/ubuntu/gpg | sudo apt-key add -
添加Docker APT存储库到系统
1
sudo add-apt-repository "deb [arch=amd64] https://download.docker.com/linux/ubuntu $(lsb_release -cs) stable"
安装Docker
1
2
sudo apt update
sudo apt install docker-ce docker-ce-cli containerd.io

docker版本:20.10.12

查看docker服务启动状况

1
2
3
4
5
6
7
8
9
10
11
12
13
14
15
16
17
18
19
root@ubuntu:~# systemctl status docker
● docker.service - Docker Application Container Engine
Loaded: loaded (/lib/systemd/system/docker.service; enabled; vendor preset: enabled
Active: active (running) since Thu 2022-02-10 07:23:33 UTC; 10min ago
Docs: https://docs.docker.com
Main PID: 2663 (dockerd)
Tasks: 9
CGroup: /system.slice/docker.service
└─2663 /usr/bin/dockerd -H fd:// --containerd=/run/containerd/containerd.so

Feb 10 07:23:32 ubuntu dockerd[2663]: time="2022-02-10T07:23:32.763625795Z" level=warn
Feb 10 07:23:32 ubuntu dockerd[2663]: time="2022-02-10T07:23:32.763656800Z" level=warn
Feb 10 07:23:32 ubuntu dockerd[2663]: time="2022-02-10T07:23:32.763676563Z" level=warn
Feb 10 07:23:32 ubuntu dockerd[2663]: time="2022-02-10T07:23:32.764235662Z" level=info
Feb 10 07:23:32 ubuntu dockerd[2663]: time="2022-02-10T07:23:32.961536719Z" level=info
Feb 10 07:23:33 ubuntu dockerd[2663]: time="2022-02-10T07:23:33.039790463Z" level=info
Feb 10 07:23:33 ubuntu dockerd[2663]: time="2022-02-10T07:23:33.070305288Z" level=info
Feb 10 07:23:33 ubuntu dockerd[2663]: time="2022-02-10T07:23:33.070463909Z" level=info
Feb 10 07:23:33 ubuntu systemd[1]: Started Docker Application Container Engine.
Kubernetes安装
安装https工具使得apt支持ssl传输
1
apt-get update && apt-get install -y apt-transport-https
使用阿里云的源
1
2
curl https://mirrors.aliyun.com/kubernetes/apt/doc/apt-key.gpg | apt-key add -
echo "deb https://mirrors.aliyun.com/kubernetes/apt/ kubernetes-xenial main" > /etc/apt/sources.list.d/kubernetes.list
或使用中科大的源
1
2
3
cat <<EOF > /etc/apt/sources.list.d/kubernetes.list
deb http://mirrors.ustc.edu.cn/kubernetes/apt kubernetes-xenial main
EOF

更新apt报错如下

1
2
3
4
5
6
  The following signatures couldn't be verified because the public key is not available: NO_PUBKEY FEEA9169307EA071 NO_PUBKEY 8B57C5C2836F4BEB
Reading package lists... Done
W: GPG error: http://mirrors.ustc.edu.cn/kubernetes/apt kubernetes-xenial InRelease: The following signatures couldn't be verified because the public key is not available: NO_PUBKEY FEEA9169307EA071 NO_PUBKEY 8B57C5C2836F4BEB
E: The repository 'http://mirrors.ustc.edu.cn/kubernetes/apt kubernetes-xenial InRelease' is not signed.
N: Updating from such a repository can't be done securely, and is therefore disabled by default.
N: See apt-secure(8) manpage for repository creation and user configuration details.

报错提示我们需要制作一个key,其中836F4BEBNO_PUBKEY的后八位

1
2
gpg --keyserver keyserver.ubuntu.com --recv-keys 836F4BEB
gpg --export --armor 836F4BEB | sudo apt-key add -

之后重新apt-get update即可

下载相关工具

修改docker的daemon.json,将cgroup驱动和k8s设置为一致

1
2
3
4
5
6
7
root@ubuntu1:~# cat /etc/docker/daemon.json
{
"exec-opts": ["native.cgroupdriver=systemd"],
"registry-mirrors": [
"https://docker.mirrors.ustc.edu.cn/",
"https://hub-mirror.c.163.com"],
}
1
2
apt-get update
apt-get install -y kubelet kubeadm kubectl
查看k8s版本
1
2
3
root@ubuntu:~# kubectl version
Client Version: version.Info{Major:"1", Minor:"23", GitVersion:"v1.23.3", GitCommit:"816c97ab8cff8a1c72eccca1026f7820e93e0d25", GitTreeState:"clean", BuildDate:"2022-01-25T21:25:17Z", GoVersion:"go1.17.6", Compiler:"gc", Platform:"linux/amd64"}
Server Version: version.Info{Major:"1", Minor:"23", GitVersion:"v1.23.3", GitCommit:"816c97ab8cff8a1c72eccca1026f7820e93e0d25", GitTreeState:"clean", BuildDate:"2022-01-25T21:19:12Z", GoVersion:"go1.17.6", Compiler:"gc", Platform:"linux/amd64"}
初始化master节点
1
2
3
4
kubeadm init \
--apiserver-advertise-address=192.168.19.84 \
--image-repository registry.aliyuncs.com/google_containers \
--pod-network-cidr=10.244.0.0/16
配置kubectl工具
1
2
mkdir -p $HOME/.kube
sudo cp -i /etc/kubernetes/admin.conf $HOME/.kube/config
查看节点状态
1
2
3
root@ubuntu:~# kubectl get nodes
NAME STATUS ROLES AGE VERSION
ubuntu NotReady control-plane,master 15m v1.23.3

状态显示为NotReady,查看日志,发现没有安装网络插件

1
2
3
root@ubuntu:~# journalctl -u kubelet -f
-- Logs begin at Mon 2020-02-24 09:48:27 UTC. --
Feb 10 08:08:58 ubuntu kubelet[11230]: I0210 08:08:58.892005 11230 cni.go:240] "Unable to update cni config" err="no networks found in /etc/cni/net.d"
安装pod插件flannel
1
2
3
4
5
6
7
8
root@ubuntu:~# kubectl apply -f https://raw.githubusercontent.com/coreos/flannel/master/Documentation/kube-flannel.yml
Warning: policy/v1beta1 PodSecurityPolicy is deprecated in v1.21+, unavailable in v1.25+
podsecuritypolicy.policy/psp.flannel.unprivileged created
clusterrole.rbac.authorization.k8s.io/flannel created
clusterrolebinding.rbac.authorization.k8s.io/flannel created
serviceaccount/flannel created
configmap/kube-flannel-cfg created
daemonset.apps/kube-flannel-ds created
再次查看节点状态
1
2
3
root@ubuntu:~# kubectl get nodes
NAME STATUS ROLES AGE VERSION
ubuntu Ready control-plane,master 18m v1.23.3
允许master部署pod
1
kubectl taint nodes --all node-role.kubernetes.io/master-

服务网格

服务网格是一个专注于处理服务间通信的基础设施层,它负责在现代云原生应用组成的复杂网络拓扑中可靠的传递请求

服务网格特点

  • 轻量级的网络代理
  • 应用无感知
  • 应用之间的流量由服务网格接管
  • 服务间的调用可能出现的超时、重试、监控、追踪等工作下沉到服务网格层处理

网格一般由数据平面和控制平面组成,数据平面负责在服务中部署一个sidecar的请求代理,控制平面负责请求代理之间的交互,以及用户与请求代理的交互。

Istio

通过负载均衡、service-to-service身份验证、监视等方法,Istio可以轻松地创建部署服务网格,而服务代码更改很少或没有更改,我们可以在整个环境中部署一个特殊的sidecar代理来为服务添加Istio支持,该代理可以拦截微服务之间的所有网络通信,然后使用其控制平面功能来配置和管理Istio,其中包括:

  • HTTP、gRPC、WebSocket和TCP流量的自动负载平衡
  • 使用丰富的路由规则、重试、故障转移和故障注入对流量欣慰进行细粒度控制
  • 支持访问控制、速率限制和配额的可插拔策略层和配置API
  • 集群内所有流量的自动度量、日志和跟踪,包括集群入口和出口
  • 在具有强大的基于身份的身份验证和授权的集群中实现安全的服务到服务通信

Istio的核心功能

流量管理

Istio的简单规则配置和流量路由允许控制服务之间的流量和API调用流,Istio简化了服务级属性(如断路器,超时和重试)的配置,并且简化了设置重要任务(如A/B测试,金丝雀测试和按百分比划分的分阶段测试)的工作。有了过呢好的流量可视性和开箱即用故障恢复功能,可以在问题产生之前捕获问题,使调用更可靠,网络更健壮。

安全

Istio的安全功能使开发人员可以专注于应用程序级别的安全。Istio提供了底层的安全通信通道,并按比例管理服务通信的身份验证、授权和加密。通过Istio,服务通信在缺省情况下是安全的。允许在不同的协议和运行时之间一致地实施策略。

观察

Isio的见状跟踪、监视和日志功能使得我们可以更加深入了解服务网格部署。通过Istio的监视功能,可以真正理解服务性能如何影响上游和下游的事情。而它的自定义仪表板提供了对所有服务的性能的可见性。

安装Istio

安装文档地址:https://istio.io/latest/docs/setup/getting-started/

下载1.11.6版本
1
curl -L https://istio.io/downloadIstio | ISTIO_VERSION=1.11.6 sh -
进入到下载目录
1
cd istio-1.11.6/
添加istioctl客户端到路径
1
export PATH=$PWD/bin:$PATH
查看Istio部署模式
1
2
3
4
5
6
7
8
9
10
root@ubuntu:~/istio-1.11.6# istioctl profile list
Istio configuration profiles:
default
demo
empty
external
minimal
openshift
preview
remote
设置部署模式为demo
1
istioctl manifest apply --set profile=demo
添加命名空间的标签
1
2
kubectl label namespace default istio-injection=enabled
namespace/default labeled
部署案例应用
部署bookinfo案例
1
2
3
4
5
6
7
8
9
10
11
12
13
14
15
root@ubuntu:~/istio-1.11.6# kubectl apply -f samples/bookinfo/platform/kube/bookinfo.yaml
service/details created
serviceaccount/bookinfo-details created
deployment.apps/details-v1 created
service/ratings created
serviceaccount/bookinfo-ratings created
deployment.apps/ratings-v1 created
service/reviews created
serviceaccount/bookinfo-reviews created
deployment.apps/reviews-v1 created
deployment.apps/reviews-v2 created
deployment.apps/reviews-v3 created
service/productpage created
serviceaccount/bookinfo-productpage created
deployment.apps/productpage-v1 created
查看pod情况
1
2
3
4
5
6
7
8
root@ubuntu:~/istio-1.11.6# kubectl get pods
NAME READY STATUS RESTARTS AGE
details-v1-5498c86cf5-bhv2h 2/2 Running 0 13m
productpage-v1-65b75f6885-p6k2w 2/2 Running 0 13m
ratings-v1-b477cf6cf-k84kr 2/2 Running 0 13m
reviews-v1-79d546878f-q6f62 2/2 Running 0 13m
reviews-v2-548c57f459-cqq2r 2/2 Running 0 13m
reviews-v3-6dd79655b9-gr42h 2/2 Running 0 13m
检查运行是否正常
1
2
root@ubuntu:~/istio-1.11.6# kubectl exec "$(kubectl get pod -l app=ratings -o jsonpath='{.items[0].metadata.name}')" -c ratings -- curl -sS productpage:9080/productpage | grep -o "<title>.*</title>"
<title>Simple Bookstore App</title>
开启外部访问
关联Istio网关
1
kubectl apply -f samples/bookinfo/networking/bookinfo-gateway.yaml
查看服务外部访问方式
1
2
3
root@ubuntu:~/istio-1.11.6# kubectl get svc istio-ingressgateway -n istio-system
NAME TYPE CLUSTER-IP EXTERNAL-IP PORT(S) AGE
istio-ingressgateway LoadBalancer 10.96.244.67 <none> 15021:32085/TCP,80:31356/TCP,443:31869/TCP,31400:31862/TCP,15443:31190/TCP
修改访问方式为NodePort
1
kubectl edit svc istio-ingressgateway -n istio-system
访问测试
1
2
3
4
5
6
7
8
9
10
11
12
13
14
15
16
17
root@ubuntu:~/istio-1.11.6# curl 192.168.19.85:31356/productpage
<!DOCTYPE html>
<html>
<head>
<title>Simple Bookstore App</title>
<meta charset="utf-8">
<meta http-equiv="X-UA-Compatible" content="IE=edge">
<meta name="viewport" content="width=device-width, initial-scale=1.0">

<!-- Latest compiled and minified CSS -->
<link rel="stylesheet" href="static/bootstrap/css/bootstrap.min.css">

<!-- Optional theme -->
<link rel="stylesheet" href="static/bootstrap/css/bootstrap-theme.min.css">

</head>
<body>

ebpf加速ServiceMesh实验

代码地址:https://github.com/merbridge/merbridge

升级内核

实验要求内核版本>=5.7,首先我们还是通过命令查询指定版本的Linux镜像包,发现没有找到可用的版本

1
root@ubuntu:~# apt-cache search linux| grep 5.8

因此我们直接去官方下载

地址:https://kernel.ubuntu.com/~kernel-ppa/mainline/

1
2
3
4
wget -c https://kernel.ubuntu.com/~kernel-ppa/mainline/v5.8/amd64/linux-headers-5.8.0-050800-generic_5.8.0-050800.202008022230_amd64.deb
wget -c https://kernel.ubuntu.com/~kernel-ppa/mainline/v5.8/amd64/linux-headers-5.8.0-050800_5.8.0-050800.202008022230_all.deb
wget -c https://kernel.ubuntu.com/~kernel-ppa/mainline/v5.8/amd64/linux-image-unsigned-5.8.0-050800-generic_5.8.0-050800.202008022230_amd64.deb
wget -c https://kernel.ubuntu.com/~kernel-ppa/mainline/v5.8/amd64/linux-modules-5.8.0-050800-generic_5.8.0-050800.202008022230_amd64.deb

安装内核Deb软件包

1
root@ubuntu:~# sudo dpkg -i *.deb

安装结束后,重新启动系统后查看内核版本

1
2
root@ubuntu:~# uname -r
5.8.0-050800-generic
相关版本说明
1
2
3
4
5
6
7
8
9
10
11
12
13
14
root@ubuntu:~# docker version
Client: Docker Engine - Community
Version: 20.10.12
root@ubuntu:~# kubectl version
Client Version: version.Info{Major:"1", Minor:"23", GitVersion:"v1.23.3", GitCommit:"816c97ab8cff8a1c72eccca1026f7820e93e0d25", GitTreeState:"clean", BuildDate:"2022-01-25T21:25:17Z", GoVersion:"go1.17.6", Compiler:"gc", Platform:"linux/amd64"}
Server Version: version.Info{Major:"1", Minor:"23", GitVersion:"v1.23.3", GitCommit:"816c97ab8cff8a1c72eccca1026f7820e93e0d25", GitTreeState:"clean", BuildDate:"2022-01-25T21:19:12Z", GoVersion:"go1.17.6", Compiler:"gc", Platform:"linux/amd64"}
root@ubuntu:~# lsb_release -a
No LSB modules are available.
Distributor ID: Ubuntu
Description: Ubuntu 20.04 LTS
Release: 20.04
Codename: focal
root@ubuntu:~# uname -r
5.8.0-050800-generic
yaml文件apply之前的ebpf数据

列出系统中所有cgroup上的附加程序

1
2
3
4
5
6
7
8
9
10
11
12
root@ubuntu:~# bpftool cgroup tree
CgroupPath
ID AttachType AttachFlags Name
/sys/fs/cgroup/unified/system.slice/systemd-udevd.service
21 ingress
20 egress
/sys/fs/cgroup/unified/system.slice/systemd-journald.service
19 ingress
18 egress
/sys/fs/cgroup/unified/system.slice/systemd-logind.service
23 ingress
22 egress

查看系统中已经加载的所有BPF程序

1
2
3
4
5
6
7
8
9
10
11
12
13
14
15
16
17
18
19
root@ubuntu:~# bpftool prog show
18: cgroup_skb tag 6deef7357e7b4530 gpl
loaded_at 2022-02-17T08:35:47+0000 uid 0
xlated 64B jited 66B memlock 4096B
19: cgroup_skb tag 6deef7357e7b4530 gpl
loaded_at 2022-02-17T08:35:47+0000 uid 0
xlated 64B jited 66B memlock 4096B
20: cgroup_skb tag 6deef7357e7b4530 gpl
loaded_at 2022-02-17T08:35:47+0000 uid 0
xlated 64B jited 66B memlock 4096B
21: cgroup_skb tag 6deef7357e7b4530 gpl
loaded_at 2022-02-17T08:35:47+0000 uid 0
xlated 64B jited 66B memlock 4096B
22: cgroup_skb tag 6deef7357e7b4530 gpl
loaded_at 2022-02-17T08:35:47+0000 uid 0
xlated 64B jited 66B memlock 4096B
23: cgroup_skb tag 6deef7357e7b4530 gpl
loaded_at 2022-02-17T08:35:47+0000 uid 0
xlated 64B jited 66B memlock 4096B
merbridge安装
1
2
3
4
5
root@ubuntu:~# kubectl apply -f https://raw.githubusercontent.com/merbridge/merbridge/main/deploy/all-in-one.yaml
clusterrole.rbac.authorization.k8s.io/merbridge created
clusterrolebinding.rbac.authorization.k8s.io/merbridge created
serviceaccount/merbridge created
daemonset.apps/merbridge created
1
2
3
4
5
6
root@ubuntu:~# kubectl get pods -n istio-system
NAME READY STATUS RESTARTS AGE
istio-egressgateway-79bb75fcf9-7plxw 1/1 Running 0 17h
istio-ingressgateway-84bfcfd895-ktbcg 1/1 Running 0 17h
istiod-6c5cfd79db-4ww7r 1/1 Running 0 17h
merbridge-75rr6 0/1 Init:0/1 0 2m57s
1
2
3
4
5
6
root@ubuntu:~# kubectl get pods -n istio-system
NAME READY STATUS RESTARTS AGE
istio-egressgateway-79bb75fcf9-7plxw 1/1 Running 0 19h
istio-ingressgateway-84bfcfd895-ktbcg 1/1 Running 0 19h
istiod-6c5cfd79db-4ww7r 1/1 Running 0 19h
merbridge-75rr6 1/1 Running 0 12m

再次查看系统中所有 cgroup 上的附加程序

1
2
3
4
5
6
7
8
9
10
11
12
13
14
15
16
17
root@ubuntu:~# bpftool cgroup tree
CgroupPath
ID AttachType AttachFlags Name
/sys/fs/cgroup/unified
31 sock_ops mb_sockops
43 bind4 mb_bind
27 connect4 mb_sock4_connec
35 getsockopt mb_get_sockopt
/sys/fs/cgroup/unified/system.slice/systemd-udevd.service
21 ingress
20 egress
/sys/fs/cgroup/unified/system.slice/systemd-journald.service
19 ingress
18 egress
/sys/fs/cgroup/unified/system.slice/systemd-logind.service
23 ingress
22 egress

再次查看系统中已经加载的所有 BPF 程序

1
2
3
4
5
6
7
8
9
10
11
12
13
14
15
16
17
18
19
20
21
22
23
24
25
26
27
28
29
30
31
32
33
34
35
36
37
38
39
root@ubuntu:~# bpftool prog show
18: cgroup_skb tag 6deef7357e7b4530 gpl
loaded_at 2022-02-17T08:35:47+0000 uid 0
xlated 64B jited 66B memlock 4096B
19: cgroup_skb tag 6deef7357e7b4530 gpl
loaded_at 2022-02-17T08:35:47+0000 uid 0
xlated 64B jited 66B memlock 4096B
20: cgroup_skb tag 6deef7357e7b4530 gpl
loaded_at 2022-02-17T08:35:47+0000 uid 0
xlated 64B jited 66B memlock 4096B
21: cgroup_skb tag 6deef7357e7b4530 gpl
loaded_at 2022-02-17T08:35:47+0000 uid 0
xlated 64B jited 66B memlock 4096B
22: cgroup_skb tag 6deef7357e7b4530 gpl
loaded_at 2022-02-17T08:35:47+0000 uid 0
xlated 64B jited 66B memlock 4096B
23: cgroup_skb tag 6deef7357e7b4530 gpl
loaded_at 2022-02-17T08:35:47+0000 uid 0
xlated 64B jited 66B memlock 4096B
27: cgroup_sock_addr name mb_sock4_connec tag 52444be6f9070ca0 gpl
loaded_at 2022-02-17T09:32:53+0000 uid 0
xlated 2336B jited 1329B memlock 4096B map_ids 1,2,3,7
btf_id 3
31: sock_ops name mb_sockops tag 92e9974a3364b015 gpl
loaded_at 2022-02-17T09:32:53+0000 uid 0
xlated 1272B jited 704B memlock 4096B map_ids 1,3,8,9
btf_id 6
35: cgroup_sockopt name mb_get_sockopt tag d2a89e73318e6dc2 gpl
loaded_at 2022-02-17T09:32:53+0000 uid 0
xlated 864B jited 509B memlock 4096B map_ids 8
btf_id 9
39: sk_msg name mb_msg_redir tag 95e99118f09830d0 gpl
loaded_at 2022-02-17T09:32:53+0000 uid 0
xlated 376B jited 237B memlock 4096B map_ids 9
btf_id 12
43: cgroup_sock_addr name mb_bind tag 57cd311f2e27366b gpl
loaded_at 2022-02-17T09:32:53+0000 uid 0
xlated 16B jited 40B memlock 4096B
btf_id 15

发现ebpf程序已经成功加载进内核

确认ebpf程序生效

yaml文件开启debug模式

打开日志追踪

1
echo 1 > /sys/kernel/debug/tracing/tracing_on

再次访问192.168.19.84:31356/productpage

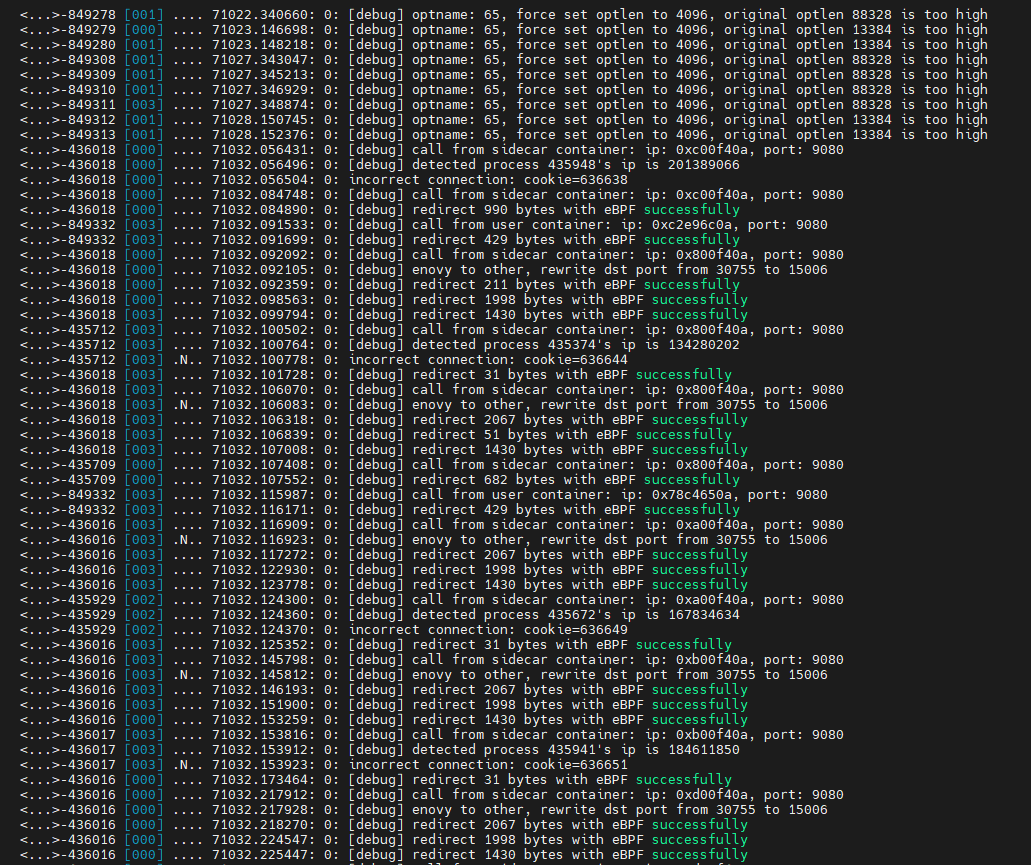
使用cat /sys/kernel/debug/tracing/trace_pipe查看输出

1

tps测试如下

其中85是没有部署merbridge的,即没有通过ebpf加速。84是经过ebpf加速的,可以看到经过ebpf加速之后tps增加了一倍。

1
2
3
4
5
6
7
8
9
10
11
12
13
14
15
16
17
18
19
20
21
22
23
24
25
root@ubuntu:~/wrk-master# ./wrk -c1000 --latency http://192.168.19.85:31356/productpage
Running 10s test @ http://192.168.19.85:31356/productpage
2 threads and 1000 connections
Thread Stats Avg Stdev Max +/- Stdev
Latency 1.19s 402.47ms 1.96s 77.78%
Req/Sec 14.47 12.03 50.00 78.95%
Latency Distribution
50% 1.21s
75% 1.34s
90% 1.77s
99% 1.96s
111 requests in 10.04s, 544.62KB read

root@ubuntu:~/wrk-master# ./wrk -c1000 --latency http://192.168.19.84:31356/productpage
Running 10s test @ http://192.168.19.84:31356/productpage
2 threads and 1000 connections
Thread Stats Avg Stdev Max +/- Stdev
Latency 1.52s 367.79ms 1.98s 80.85%
Req/Sec 17.94 18.18 140.00 89.08%
Latency Distribution
50% 1.61s
75% 1.72s
90% 1.85s
99% 1.98s
243 requests in 10.02s, 1.17MB read

集群测试

集群测试分为两组

  • 没有经过merbridge加速:192.168.19.85和192.168.19.83
  • 经过merbridge加速:192.168.19.84和192.168.19.82

master节点分别是192.168.19.85和192.168.19.84

slave节点配置

1.安装docker和k8s工具,这里不再赘述

2.将从节点加入主节点

主节点查看令牌,没有则需要创建令牌

1
root@ubuntu:~# kubeadm token list
1
root@ubuntu:~# kubeadm token create

如果没有 --discovery-token-ca-cert-hash 的值,则可以通过在控制平面节点上执行以下命令来获取

1
2
root@ubuntu:~# openssl x509 -pubkey -in /etc/kubernetes/pki/ca.crt | openssl rsa -pubin -outform der 2>/dev/null | \
openssl dgst -sha256 -hex | sed 's/^.* //'

3.从节点执行kubeadm join命令

1
2
3
4
5
6
7
8
9
10
11
12
13
14
15
16
root@ubuntu1:/etc/kubernetes# swapoff -a
root@ubuntu1:/etc/kubernetes# kubeadm join --token 11sf7j.b46h7ej8l01pddgj 192.168.19.85:6443 --discovery-token-ca-cert-hash sha256:dde9c1d26f1d6178203ed03e6e3e0df6c0d926aa60fba0f0a4e2a88b47b95a69
[preflight] Running pre-flight checks
[preflight] Reading configuration from the cluster...
[preflight] FYI: You can look at this config file with 'kubectl -n kube-system get cm kubeadm-config -o yaml'
W0222 09:41:45.561758 4675 utils.go:69] The recommended value for "resolvConf" in "KubeletConfiguration" is: /run/systemd/resolve/resolv.conf; the provided value is: /run/systemd/resolve/resolv.conf
[kubelet-start] Writing kubelet configuration to file "/var/lib/kubelet/config.yaml"
[kubelet-start] Writing kubelet environment file with flags to file "/var/lib/kubelet/kubeadm-flags.env"
[kubelet-start] Starting the kubelet
[kubelet-start] Waiting for the kubelet to perform the TLS Bootstrap...

This node has joined the cluster:
* Certificate signing request was sent to apiserver and a response was received.
* The Kubelet was informed of the new secure connection details.

Run 'kubectl get nodes' on the control-plane to see this node join the cluster.

4.主节点查看nodes情况

1
2
3
4
root@ubuntu:/etc/kubernetes# kubectl get nodes
NAME STATUS ROLES AGE VERSION
ubuntu Ready control-plane,master 12d v1.23.3
ubuntu1 Ready <none> 2m46s v1.23.4

5.查看pod的分布情况

192.168.19.85

1
2
3
4
5
6
7
8
9
10
11
12
13
14
15
16
17
18
19
20
21
22
23
24
root@ubuntu:~# kubectl get pod --all-namespaces -o wide
NAMESPACE NAME READY STATUS RESTARTS AGE IP NODE NOMINATED NODE READINESS GATES
default details-v1-5498c86cf5-bhv2h 2/2 Running 26 (40h ago) 12d 10.244.0.175 ubuntu <none> <none>
default helloworld-v1-fdb8c8c58-gh4sf 2/2 Running 0 39h 10.244.1.4 ubuntu1 <none> <none>
default helloworld-v2-5b46bc9f84-glxpg 2/2 Running 0 39h 10.244.1.3 ubuntu1 <none> <none>
default productpage-v1-65b75f6885-p6k2w 2/2 Running 26 (40h ago) 12d 10.244.0.171 ubuntu <none> <none>
default ratings-v1-b477cf6cf-k84kr 2/2 Running 26 (40h ago) 12d 10.244.0.179 ubuntu <none> <none>
default reviews-v1-79d546878f-q6f62 2/2 Running 26 (40h ago) 12d 10.244.0.168 ubuntu <none> <none>
default reviews-v2-548c57f459-cqq2r 2/2 Running 26 (40h ago) 12d 10.244.0.180 ubuntu <none> <none>
default reviews-v3-6dd79655b9-gr42h 2/2 Running 26 (40h ago) 12d 10.244.0.173 ubuntu <none> <none>
default sleep-698cfc4445-k8ncb 2/2 Running 0 39h 10.244.1.2 ubuntu1 <none> <none>
istio-system istio-egressgateway-79bb75fcf9-z6pqt 1/1 Running 13 (40h ago) 12d 10.244.0.178 ubuntu <none> <none>
istio-system istio-ingressgateway-84bfcfd895-cdkwd 1/1 Running 13 (40h ago) 12d 10.244.0.176 ubuntu <none> <none>
istio-system istiod-6c5cfd79db-8nqqb 1/1 Running 14 (40h ago) 12d 10.244.0.174 ubuntu <none> <none>
kube-system coredns-6d8c4cb4d-8xrmh 1/1 Running 15 (40h ago) 13d 10.244.0.169 ubuntu <none> <none>
kube-system coredns-6d8c4cb4d-cv77n 1/1 Running 14 (40h ago) 13d 10.244.0.181 ubuntu <none> <none>
kube-system etcd-ubuntu 1/1 Running 16 (40h ago) 13d 192.168.19.85 ubuntu <none> <none>
kube-system kube-apiserver-ubuntu 1/1 Running 14 (40h ago) 13d 192.168.19.85 ubuntu <none> <none>
kube-system kube-controller-manager-ubuntu 1/1 Running 14 (40h ago) 13d 192.168.19.85 ubuntu <none> <none>
kube-system kube-flannel-ds-87xdz 1/1 Running 18 (40h ago) 13d 192.168.19.85 ubuntu <none> <none>
kube-system kube-flannel-ds-drk55 1/1 Running 0 40h 192.168.19.83 ubuntu1 <none> <none>
kube-system kube-proxy-9rwc5 1/1 Running 0 40h 192.168.19.83 ubuntu1 <none> <none>
kube-system kube-proxy-qkcxz 1/1 Running 14 (40h ago) 13d 192.168.19.85 ubuntu <none> <none>
kube-system kube-scheduler-ubuntu 1/1 Running 14 (40h ago) 13d 192.168.19.85 ubuntu <none> <none>

192.168.19.84

1
2
3
4
5
6
7
8
9
10
11
12
13
14
15
16
17
18
19
20
21
22
23
24
25
26
root@ubuntu:~# kubectl get pod --all-namespaces -o wide
NAMESPACE NAME READY STATUS RESTARTS AGE IP NODE NOMINATED NODE READINESS GATES
default details-v1-5498c86cf5-7qwql 2/2 Running 2 (23h ago) 6d16h 10.244.0.34 ubuntu <none> <none>
default helloworld-v1-fdb8c8c58-28pm4 2/2 Running 0 22h 10.244.1.5 ubuntu1 <none> <none>
default helloworld-v2-5b46bc9f84-rs5ch 2/2 Running 0 22h 10.244.1.6 ubuntu1 <none> <none>
default productpage-v1-65b75f6885-kt88j 2/2 Running 2 (23h ago) 6d16h 10.244.0.31 ubuntu <none> <none>
default ratings-v1-b477cf6cf-8bdk9 2/2 Running 2 (23h ago) 6d16h 10.244.0.35 ubuntu <none> <none>
default reviews-v1-79d546878f-nf4xd 2/2 Running 2 (23h ago) 6d16h 10.244.0.25 ubuntu <none> <none>
default reviews-v2-548c57f459-sdjzs 2/2 Running 2 (23h ago) 6d16h 10.244.0.24 ubuntu <none> <none>
default reviews-v3-6dd79655b9-p6vdg 2/2 Running 2 (23h ago) 6d16h 10.244.0.26 ubuntu <none> <none>
default sleep-698cfc4445-qncjl 2/2 Running 0 22h 10.244.1.4 ubuntu1 <none> <none>
istio-system istio-egressgateway-79bb75fcf9-7plxw 1/1 Running 1 (23h ago) 6d17h 10.244.0.29 ubuntu <none> <none>
istio-system istio-ingressgateway-84bfcfd895-ktbcg 1/1 Running 1 (23h ago) 6d17h 10.244.0.32 ubuntu <none> <none>
istio-system istiod-6c5cfd79db-4ww7r 1/1 Running 1 (23h ago) 6d17h 10.244.0.23 ubuntu <none> <none>
istio-system merbridge-9kmsk 1/1 Running 1 (23h ago) 5d21h 10.244.0.28 ubuntu <none> <none>
istio-system merbridge-jqt9x 1/1 Running 7 (23h ago) 23h 10.244.1.3 ubuntu1 <none> <none>
kube-system coredns-6d8c4cb4d-87slm 1/1 Running 1 (23h ago) 6d17h 10.244.0.36 ubuntu <none> <none>
kube-system coredns-6d8c4cb4d-ld7cp 1/1 Running 1 (23h ago) 6d17h 10.244.0.33 ubuntu <none> <none>
kube-system etcd-ubuntu 1/1 Running 4 (23h ago) 6d17h 192.168.19.84 ubuntu <none> <none>
kube-system kube-apiserver-ubuntu 1/1 Running 4 (23h ago) 6d17h 192.168.19.84 ubuntu <none> <none>
kube-system kube-controller-manager-ubuntu 1/1 Running 4 (23h ago) 6d17h 192.168.19.84 ubuntu <none> <none>
kube-system kube-flannel-ds-7lvxj 1/1 Running 1 (23h ago) 23h 192.168.19.82 ubuntu1 <none> <none>
kube-system kube-flannel-ds-fqtst 1/1 Running 1 (23h ago) 6d16h 192.168.19.84 ubuntu <none> <none>
kube-system kube-proxy-9kwsc 1/1 Running 1 (23h ago) 23h 192.168.19.82 ubuntu1 <none> <none>
kube-system kube-proxy-p8nw9 1/1 Running 1 (23h ago) 6d17h 192.168.19.84 ubuntu <none> <none>
kube-system kube-scheduler-ubuntu 1/1 Running 4 (23h ago) 6d17h 192.168.19.84 ubuntu <none> <none>
外部向pod发送请求
集群内

在node为192.168.19.85的机器上向node为192.168.19.83机器上的pod发送请求(没有merbridge加速)

1
2
3
4
5
6
7
8
9
10
11
12
13
14
15
root@ubuntu:~# wrk -c1000 --latency http://192.168.19.83:31356/productpage
Running 10s test @ http://192.168.19.83:31356/productpage
2 threads and 1000 connections
Thread Stats Avg Stdev Max +/- Stdev
Latency 1.62s 294.11ms 1.97s 66.67%
Req/Sec 9.85 8.67 50.00 78.87%
Latency Distribution
50% 1.73s
75% 1.85s
90% 1.97s
99% 1.97s
108 requests in 10.07s, 530.88KB read
Socket errors: connect 0, read 0, write 0, timeout 99
Requests/sec: 10.72
Transfer/sec: 52.72KB

在node为192.168.19.84的机器上向node为192.168.19.82机器上的pod发送请求(有merbridge加速)

1
2
3
4
5
6
7
8
9
10
11
12
13
14
15
root@ubuntu:~# wrk -c1000 --latency http://192.168.19.82:31356/productpage
Running 10s test @ http://192.168.19.82:31356/productpage
2 threads and 1000 connections
Thread Stats Avg Stdev Max +/- Stdev
Latency 1.65s 252.43ms 1.99s 53.33%
Req/Sec 20.50 14.91 70.00 67.33%
Latency Distribution
50% 1.71s
75% 1.92s
90% 1.97s
99% 1.99s
233 requests in 10.10s, 1.12MB read
Socket errors: connect 0, read 0, write 0, timeout 218
Requests/sec: 23.08
Transfer/sec: 113.95KB
集群间

在node为192.168.19.85的机器上向node为192.168.19.84机器上的pod发送请求(其中84上部署了merbridge加速)

1
2
3
4
5
6
7
8
9
10
11
12
13
14
15
root@ubuntu:~# wrk -c1000 --latency http://192.168.19.84:31356/productpage
Running 10s test @ http://192.168.19.84:31356/productpage
2 threads and 1000 connections
Thread Stats Avg Stdev Max +/- Stdev
Latency 1.54s 365.46ms 1.96s 70.00%
Req/Sec 16.30 11.91 60.00 72.84%
Latency Distribution
50% 1.79s
75% 1.88s
90% 1.95s
99% 1.96s
157 requests in 10.10s, 770.66KB read
Socket errors: connect 0, read 0, write 0, timeout 137
Requests/sec: 15.55
Transfer/sec: 76.33KB

在node为192.168.19.84的机器上向node为192.168.19.85机器上的pod发送请求(其中85没有部署merbridge加速)

1
2
3
4
5
6
7
8
9
10
11
12
13
14
15
root@ubuntu:~# wrk -c1000 --latency http://192.168.19.85:31356/productpage
Running 10s test @ http://192.168.19.85:31356/productpage
2 threads and 1000 connections
Thread Stats Avg Stdev Max +/- Stdev
Latency 1.23s 671.98ms 1.82s 100.00%
Req/Sec 10.85 7.15 30.00 50.85%
Latency Distribution
50% 1.80s
75% 1.82s
90% 1.82s
99% 1.82s
84 requests in 10.10s, 412.15KB read
Socket errors: connect 0, read 0, write 0, timeout 80
Requests/sec: 8.32
Transfer/sec: 40.81KB
同一node下pod间发送请求
pod内安装wrk

进入pod

1
kubectl exec -it <pod-name> /bin/sh

安装wrk压测工具发现无法执行命令

1
2
3
4
5
6
7
/ $ ls
bin dev etc lib mnt proc run srv tmp var
cacert.pem entrypoint.sh home media opt root sbin sys usr
/ $ sudo
/bin/sh: sudo: not found
/ $ apt
/bin/sh: apt: not found

解决办法:https://stackoverflow.com/questions/45142855/bin-sh-apt-get-not-found

通过docker以root身份进入容器

1
docker exec -it --user=root <CONTAINER ID> /bin/sh

使用apk命令安装

1
2
3
4
5
6
7
8
9
10
/ # apk update
/ # apk add Package
这里需要安装的package如下
- gcc
- make
- automake
- autoconf
- libtool
- linux-headers
- libc-dev

在wrk目录下执行make

1
/tmp/wrk-master # make

在名为sleep-698cfc4445-k8ncb的pod下,对名为helloworld-v1-fdb8c8c58-gh4sf的pod发起请求。这两个pod同属于192.168.19.83节点,在该node下没有部署merbridge加速

1
2
3
4
5
6
7
8
9
10
11
12
13
14
15
16
/tmp/wrk-master # wrk -c10000 --latency http://10.101.180.145:5000
Running 10s test @ http://10.101.180.145:5000
2 threads and 10000 connections
Thread Stats Avg Stdev Max +/- Stdev
Latency 757.70ms 403.53ms 1.54s 51.72%
Req/Sec 20.85 30.78 170.00 94.87%
Latency Distribution
50% 724.43ms
75% 1.09s
90% 1.31s
99% 1.54s
136 requests in 10.22s, 52.28KB read
Socket errors: connect 0, read 0, write 0, timeout 107
Non-2xx or 3xx responses: 136
Requests/sec: 13.31
Transfer/sec: 5.12KB

在名为sleep-698cfc4445-qncjl的pod下,对名为helloworld-v1-fdb8c8c58-28pm4的pod发起请求。这两个pod同属于192.168.19.82节点,在该node部署了merbridge加速

1
2
3
4
5
6
7
8
9
10
11
12
13
14
15
16
/tmp/wrk-master # wrk -c10000 --latency http://10.101.187.77:5000
Running 10s test @ http://10.101.187.77:5000
2 threads and 10000 connections
Thread Stats Avg Stdev Max +/- Stdev
Latency 1.91s 20.63ms 1.98s 82.22%
Req/Sec 78.02 96.83 495.00 86.67%
Latency Distribution
50% 1.92s
75% 1.92s
90% 1.92s
99% 1.98s
461 requests in 10.10s, 177.23KB read
Socket errors: connect 0, read 0, write 0, timeout 416
Non-2xx or 3xx responses: 461
Requests/sec: 45.67
Transfer/sec: 17.56KB
不同node下pod间发送请求

在node为192.168.19.83名为sleep-698cfc4445-k8ncb的pod下,对node为192.168.19.85名为productpage-v1-65b75f6885-p6k2w的pod发起请求。这两个pod不属于同一个node下,在该集群下没有部署merbridge加速

1
2
3
4
5
6
7
8
9
10
11
12
13
14
15
/ $ wrk -c1000 --latency http://192.168.19.85:31356/productpage
Running 10s test @ http://192.168.19.85:31356/productpage
2 threads and 1000 connections
Thread Stats Avg Stdev Max +/- Stdev
Latency 1.69s 0.00us 1.69s 100.00%
Req/Sec 5.98 4.32 20.00 75.47%
Latency Distribution
50% 1.69s
75% 1.69s
90% 1.69s
99% 1.69s
62 requests in 10.04s, 304.85KB read
Socket errors: connect 0, read 0, write 0, timeout 61
Requests/sec: 6.17
Transfer/sec: 30.35KB

在node为192.168.19.82名为sleep-698cfc4445-qncjl的pod下,对node为192.168.19.84名为productpage-v1-65b75f6885-kt88j的pod发起请求。这两个pod不属于同一个node下,在该集群下部署了merbridge加速

1
2
3
4
5
6
7
8
9
10
11
12
13
14
15
/ $ wrk -c1000 --latency http://192.168.19.84:31356/productpage
Running 10s test @ http://192.168.19.84:31356/productpage
2 threads and 1000 connections
Thread Stats Avg Stdev Max +/- Stdev
Latency 1.48s 258.10ms 1.80s 83.33%
Req/Sec 15.02 14.04 90.00 84.54%
Latency Distribution
50% 1.58s
75% 1.64s
90% 1.69s
99% 1.80s
188 requests in 10.08s, 0.90MB read
Socket errors: connect 0, read 0, write 0, timeout 158
Requests/sec: 18.66
Transfer/sec: 91.41KB
拓展:从控制平面节点以外的计算机控制集群

从节点查看pod报错如下

1
2
root@ubuntu:~# kubectl get pod
The connection to the server localhost:8080 was refused - did you specify the right host or port?

出现这个问题的原因是kubectl命令需要使用kubernetes-admin来运行,解决方法如下,将主节点中的/etc/kubernetes/admin.conf文件拷贝到从节点相同目录下,然后配置环境变量

1
2
root@ubuntu:~# echo "export KUBECONFIG=/etc/kubernetes/admin.conf" >> ~/.bash_profile
root@ubuntu:~# source ~/.bash_profile

再次查看pod

1
2
3
4
5
6
7
8
9
10
11
root@ubuntu:~# kubectl get pods
NAME READY STATUS RESTARTS AGE
details-v1-5498c86cf5-bhv2h 2/2 Running 24 11d
helloworld-v1-fdb8c8c58-9nqw8 2/2 Running 0 5d
helloworld-v2-5b46bc9f84-gdzvl 2/2 Running 0 5d
productpage-v1-65b75f6885-p6k2w 2/2 Running 24 11d
ratings-v1-b477cf6cf-k84kr 2/2 Running 24 11d
reviews-v1-79d546878f-q6f62 2/2 Running 24 11d
reviews-v2-548c57f459-cqq2r 2/2 Running 24 11d
reviews-v3-6dd79655b9-gr42h 2/2 Running 24 11d
sleep-698cfc4445-8nncn 2/2 Running 0 5d1h

merbridge yaml文件解析(istio)

https://github.com/merbridge/merbridge/blob/main/deploy/all-in-one.yaml

第一段,创建对象类别,这里是集群角色

1
2
3
4
5
6
7
8
9
10
11
12
13
14
15
apiVersion: rbac.authorization.k8s.io/v1 #创建该对象所使用的 Kubernetes API 的版本
kind: ClusterRole #想要创建对象的类别
metadata: #帮助唯一性标识对象的一些数据
labels:
app: merbridge
name: merbridge
rules:
- apiGroups: #空字符串表明使用core API group
- ""
resources:
- pods
verbs: #对资源对象执行的操作
- list
- get
- watch

第二段,在集群范围执行授权,这里对集群角色权限进行绑定

1
2
3
4
5
6
7
8
9
10
11
12
13
14
apiVersion: rbac.authorization.k8s.io/v1
kind: ClusterRoleBinding #在集群范围执行授权
metadata:
labels:
app: merbridge
name: merbridge
roleRef: #指定与某 Role 或 ClusterRole 的绑定关系
apiGroup: rbac.authorization.k8s.io
kind: ClusterRole # 此字段必须是 Role 或 ClusterRole
name: merbridge # 此字段必须与你要绑定的 Role 或 ClusterRole 的名称匹配
subjects: #用来尝试操作集群的对象
- kind: ServiceAccount #为Pod中的进程和外部用户提供身份信息
name: merbridge
namespace: istio-system

第三段,为pod指定服务账户,命名空间为istio-system

1
2
3
4
5
6
7
apiVersion: v1
kind: ServiceAccount
metadata:
labels:
app: merbridge
name: merbridge
namespace: istio-system

第四段创建DaemonSet类型的pod。我们将内容拆为两部分说明

initContainers

首先我们看一下initContainers的挂载卷,需要说明的是,使用卷时, 在 .spec.volumes 字段中设置为 Pod 提供的卷,并在 .spec.containers[*].volumeMounts 字段中声明卷在容器中的挂载位置。因此我们先看一下.spec.volumes字段,如下所示

1
2
3
4
5
6
7
8
9
volumes:
- hostPath:
path: /sys/fs
name: sys-fs
- hostPath:
path: /proc
name: host-proc
- emptyDir: {}
name: host-ips

这里用到了两种存储卷类型,分别是hostPathemptyDir。对于hostPath类型,会映射node文件系统中的文件或者目录到pod里。而对于emptyDir类型,K8s会在Node上自动分配一个目录,因此无需指定宿主机Node上对应的目录文件。

接着我们回到initContainers中。看到initContainers有两个mountPath。用到了.spec.volumes下的host-ipshost-proc,挂载路径为容器中的/host/ips/host/proc

1
2
3
4
5
6
7
8
9
10
11
12
13
14
15
16
17
18
19
20
21
22
initContainers: #Init容器是一种特殊容器,在Pod内的应用容器启动之前运行
- image: ghcr.io/merbridge/merbridge:latest
imagePullPolicy: Always
name: init
args:
- sh
- -c
- nsenter --net=/host/proc/1/ns/net ip -o addr | awk '{print $4}' | tee /host/ips/ips.txt
resources:
requests:
cpu: 100m
memory: 50Mi
limits:
cpu: 300m
memory: 50Mi
securityContext:
privileged: true
volumeMounts:
- mountPath: /host/ips
name: host-ips
- mountPath: /host/proc
name: host-proc

挂载完成后,我们看一下执行参数。这里用到了nsenter命令。nsenter命令是一个可以在指定进程的命令空间下运行指定程序的命令。它位于util-linux包中。
具体使用可参考如下连接:https://juejin.cn/post/7038531145113452581
--net进入net命令空间,并指定了文件的命令空间。nsenter --net=/host/proc/1/ns/net ip -o addr命令可以查看主机的ip地址信息。在主机上测试如下

1
2
3
4
5
6
7
8
9
10
11
12
13
14
15
16
17
18
19
20
21
22
root@ubuntu:~# nsenter --net=/proc/1/ns/net ip -o addr
1: lo inet 127.0.0.1/8 scope host lo\ valid_lft forever preferred_lft forever
1: lo inet6 ::1/128 scope host \ valid_lft forever preferred_lft forever
2: ens160 inet 192.168.19.84/16 brd 192.168.255.255 scope global ens160\ valid_lft forever preferred_lft forever
2: ens160 inet6 fe80::250:56ff:fe82:8bd7/64 scope link \ valid_lft forever preferred_lft forever
3: docker0 inet 172.17.0.1/16 brd 172.17.255.255 scope global docker0\ valid_lft forever preferred_lft forever
3: docker0 inet6 fe80::42:8aff:fe54:fa57/64 scope link \ valid_lft forever preferred_lft forever
4: flannel.1 inet 10.244.0.0/32 scope global flannel.1\ valid_lft forever preferred_lft forever
4: flannel.1 inet6 fe80::e4a0:b4ff:fe2e:2c1f/64 scope link \ valid_lft forever preferred_lft forever
5: cni0 inet 10.244.0.1/24 brd 10.244.0.255 scope global cni0\ valid_lft forever preferred_lft forever
5: cni0 inet6 fe80::a4b8:52ff:fef8:6b8a/64 scope link \ valid_lft forever preferred_lft forever
6: vethffb04bf6 inet6 fe80::24c6:d7ff:fe20:b8b7/64 scope link \ valid_lft forever preferred_lft forever
7: vethf2b12fbf inet6 fe80::e83b:a4ff:fe7b:7321/64 scope link \ valid_lft forever preferred_lft forever
8: vethec8e53c3 inet6 fe80::d44b:31ff:fe17:a41c/64 scope link \ valid_lft forever preferred_lft forever
9: vethfa223ce0 inet6 fe80::5855:4fff:feef:92f0/64 scope link \ valid_lft forever preferred_lft forever
10: vethcbd6c656 inet6 fe80::c09c:62ff:fe21:df97/64 scope link \ valid_lft forever preferred_lft forever
11: vethf18457c5 inet6 fe80::b8ba:35ff:fe1f:505f/64 scope link \ valid_lft forever preferred_lft forever
12: veth4bbafc0f inet6 fe80::186e:7aff:fe98:59e4/64 scope link \ valid_lft forever preferred_lft forever
13: veth2757e288 inet6 fe80::4cb5:dff:fea6:d245/64 scope link \ valid_lft forever preferred_lft forever
14: veth40c1c447 inet6 fe80::4468:7bff:fe40:6b09/64 scope link \ valid_lft forever preferred_lft forever
15: vethc01359c4 inet6 fe80::61:aeff:fece:58ee/64 scope link \ valid_lft forever preferred_lft forever
16: vethf3f6e93e inet6 fe80::30ee:22ff:fee8:2fee/64 scope link \ valid_lft forever preferred_lft forever

这里有人可能会想为什么不直接使用ip -o addr呢,从下面结果看到这两条命令的执行结果是一样的。

1
2
3
4
5
6
7
8
9
10
11
12
13
14
15
16
17
18
19
20
21
22
23
24
25
26
27
28
29
30
31
32
33
34
35
36
37
38
39
40
41
42
43
44
root@ubuntu:~# ip -o addr | awk '{print $4}'
127.0.0.1/8
::1/128
192.168.19.84/16
fe80::250:56ff:fe82:8bd7/64
172.17.0.1/16
fe80::42:8aff:fe54:fa57/64
10.244.0.0/32
fe80::e4a0:b4ff:fe2e:2c1f/64
10.244.0.1/24
fe80::a4b8:52ff:fef8:6b8a/64
fe80::24c6:d7ff:fe20:b8b7/64
fe80::e83b:a4ff:fe7b:7321/64
fe80::d44b:31ff:fe17:a41c/64
fe80::5855:4fff:feef:92f0/64
fe80::c09c:62ff:fe21:df97/64
fe80::b8ba:35ff:fe1f:505f/64
fe80::186e:7aff:fe98:59e4/64
fe80::4cb5:dff:fea6:d245/64
fe80::4468:7bff:fe40:6b09/64
fe80::61:aeff:fece:58ee/64
fe80::30ee:22ff:fee8:2fee/64
root@ubuntu:~# nsenter --net=/proc/1/ns/net ip -o addr | awk '{print $4}'
127.0.0.1/8
::1/128
192.168.19.84/16
fe80::250:56ff:fe82:8bd7/64
172.17.0.1/16
fe80::42:8aff:fe54:fa57/64
10.244.0.0/32
fe80::e4a0:b4ff:fe2e:2c1f/64
10.244.0.1/24
fe80::a4b8:52ff:fef8:6b8a/64
fe80::24c6:d7ff:fe20:b8b7/64
fe80::e83b:a4ff:fe7b:7321/64
fe80::d44b:31ff:fe17:a41c/64
fe80::5855:4fff:feef:92f0/64
fe80::c09c:62ff:fe21:df97/64
fe80::b8ba:35ff:fe1f:505f/64
fe80::186e:7aff:fe98:59e4/64
fe80::4cb5:dff:fea6:d245/64
fe80::4468:7bff:fe40:6b09/64
fe80::61:aeff:fece:58ee/64
fe80::30ee:22ff:fee8:2fee/64

需要提一点的是,nsenter命令一个最典型的用途就是进入容器的网络命令空间。相当多的容器为了轻量级,是不包含较为基础的命令的,比如说ip addresspingtelnetsstcpdump等等命令,这就给调试容器网络带来相当大的困扰。

awk '{print $4}',这句命令是对每行按照空格或TAB分割,输出第四项

awk用法:https://www.runoob.com/linux/linux-comm-awk.html

主机测试如下

1
2
3
4
5
6
7
8
9
10
11
12
13
14
15
16
17
18
19
20
21
22
root@ubuntu:~# nsenter --net=/proc/1/ns/net ip -o addr | awk '{print $4}'
127.0.0.1/8
::1/128
192.168.19.84/16
fe80::250:56ff:fe82:8bd7/64
172.17.0.1/16
fe80::42:8aff:fe54:fa57/64
10.244.0.0/32
fe80::e4a0:b4ff:fe2e:2c1f/64
10.244.0.1/24
fe80::a4b8:52ff:fef8:6b8a/64
fe80::24c6:d7ff:fe20:b8b7/64
fe80::e83b:a4ff:fe7b:7321/64
fe80::d44b:31ff:fe17:a41c/64
fe80::5855:4fff:feef:92f0/64
fe80::c09c:62ff:fe21:df97/64
fe80::b8ba:35ff:fe1f:505f/64
fe80::186e:7aff:fe98:59e4/64
fe80::4cb5:dff:fea6:d245/64
fe80::4468:7bff:fe40:6b09/64
fe80::61:aeff:fece:58ee/64
fe80::30ee:22ff:fee8:2fee/64

之后通过tee命令将结果写入到/host/ips/ips.txt中。

从这里我们就可以看到,初始化容器的作用就是获取主机的ip地址信息,并将结果存入到ips.txt中。 Init 容器初始化完毕后就会自动终止,但是 Init 容器初始化结果会保留到应用容器和sidecar容器中。

containers

containers和初始化容器的镜像是相同的。containers中也有两个mountPath。用到了.spec.volumes下的host-ipssys-fs,挂载路径为容器中的/host/ips/sys/fs,通过securityContext定义了容器需要特权模式运行。

1
2
3
4
5
6
7
8
9
10
11
12
13
14
15
16
17
18
19
20
21
22
23
24
25
26
27
28
29
30
31
containers:
- image: ghcr.io/merbridge/merbridge:latest
imagePullPolicy: Always
name: merbridge
args: #为容器设置启动时要执行的命令和参数
- /app/mbctl
- -m
- istio
- --ips-file
- /host/ips/ips.txt
lifecycle:
preStop:
exec:
command:
- make
- -k
- clean
resources:
requests:
cpu: 100m
memory: 200Mi
limits:
cpu: 300m
memory: 200Mi
securityContext:
privileged: true
volumeMounts:
- mountPath: /sys/fs
name: sys-fs
- mountPath: /host/ips
name: host-ips

看一下该容器中的执行参数。通过源码我们看到-m是服务网格的模式,当前所支持的是istiolinkerd。这里我们使用的是istio--ips-file是当前节点的ip信息的文件名,即在initContainers中我们将ip信息写入的路径/host/ips/ips.txt

lifecycle字段是管理容器在运行前和关闭前的一些动作。其中preStop是容器被终止前的任务,用于优雅关闭应用程序、通知其他系统。这里在容器被终止前执行make clean用于清除之前编译的可执行文件及配置文件。

第五段,pod相应策略

1
2
3
4
5
6
7
8
9
10
11
dnsPolicy: ClusterFirst #针对每个Pod设置DNS的策略,ClusterFirst为默认配置
nodeSelector: #约束一个Pod只能在特定的节点上运行
kubernetes.io/os: linux
priorityClassName: system-node-critical #将Pod标记为关键性
restartPolicy: Always
serviceAccount: merbridge
serviceAccountName: merbridge
tolerations: #应用于Pod上的,允许Pod调度到带有与之匹配的污点的节点上。
- key: CriticalAddonsOnly #允许pod被重新调度
operator: Exists
- operator: Exists

eBPF程序分析

helpers.h
1
2
3
4
5
6
7
8
9
10
11
12
13
14
15
16
17
18
19
20
21
22
23
24
25
26
27
28
29
30
31
32
33
34
35
36
37
38
39
40
41
42
43
44
45
46
47
48
49
50
51
52
53
54
55
56
57
58
59
60
61
62
63
64
65
66
67
68
69
70
71
72
73
74
75
76
77
78
79
80
81
82
83
84
85
86
87
88
89
90
91
92
93
94
95
96
97
98
99
100
101
102
103
104
105
106
107
108
109
110
111
112
113
114
115
116
117
118
119
120
121
122
123
124
125
126
127
128
129
#pragma once
#include <linux/bpf.h>
#include <linux/bpf_common.h>
#include <linux/swab.h>
#include <linux/types.h>

#if __BYTE_ORDER__ == __ORDER_LITTLE_ENDIAN__
#define bpf_htons(x) __builtin_bswap16(x)
#define bpf_htonl(x) __builtin_bswap32(x)
#elif __BYTE_ORDER__ == __ORDER_BIG_ENDIAN__
#define bpf_htons(x) (x)
#define bpf_htonl(x) (x)
#else
#error "__BYTE_ORDER__ error"
#endif

#ifndef __section
#define __section(NAME) __attribute__((section(NAME), used))
#endif

//存储socket信息的映射表
struct bpf_map {
__u32 type;
__u32 key_size;
__u32 value_size;
__u32 max_entries;
__u32 map_flags;
};

//获取组id
static __u64 (*bpf_get_current_pid_tgid)() = (void *)
BPF_FUNC_get_current_pid_tgid;
//获取uid
static __u64 (*bpf_get_current_uid_gid)() = (void *)
BPF_FUNC_get_current_uid_gid;
//根据用户定义的输出,将BPF程序产生的对应日志消息保存在用来跟踪内核的文件夹
static void (*bpf_trace_printk)(const char *fmt, int fmt_size,
...) = (void *)BPF_FUNC_trace_printk;
//用当前进程名字填充第一个参数地址
static __u64 (*bpf_get_current_comm)(void *buf, __u32 size_of_buf) = (void *)
BPF_FUNC_get_current_comm;

//获取套接字的cookie,套接字通过bpf_sock_ops获得
static __u64 (*bpf_get_socket_cookie_ops)(struct bpf_sock_ops *skops) = (void *)
BPF_FUNC_get_socket_cookie;
//获取套接字的cookie,套接字通过bpf_sock_addr获得
static __u64 (*bpf_get_socket_cookie_addr)(struct bpf_sock_addr *ctx) = (void *)
BPF_FUNC_get_socket_cookie;
//在bpf_map中查找与key关联的条目
static void *(*bpf_map_lookup_elem)(struct bpf_map *map, const void *key) =
(void *)BPF_FUNC_map_lookup_elem;
//添加或更新map中key关联的条目
static __u64 (*bpf_map_update_elem)(struct bpf_map *map, const void *key,
const void *value, __u64 flags) = (void *)
BPF_FUNC_map_update_elem;
//在子网络名称空间netns中查找与TCP套接字匹配的元组
static struct bpf_sock *(*bpf_sk_lookup_tcp)(
void *ctx, struct bpf_sock_tuple *tuple, __u32 tuple_size, __u64 netns,
__u64 flags) = (void *)BPF_FUNC_sk_lookup_tcp;
static long (*bpf_sk_release)(struct bpf_sock *sock) = (void *)
BPF_FUNC_sk_release;
//添加或更新引用套接字的sockhash map
static long (*bpf_sock_hash_update)(
struct bpf_sock_ops *skops, struct bpf_map *map, void *key,
__u64 flags) = (void *)BPF_FUNC_sock_hash_update;
//消息重定向
static long (*bpf_msg_redirect_hash)(struct sk_msg_md *md, struct bpf_map *map,
void *key, __u64 flags) = (void *)
BPF_FUNC_msg_redirect_hash;

#ifdef PRINTNL
#define PRINT_SUFFIX "\n"
#else
#define PRINT_SUFFIX ""
#endif

#ifndef printk
#define printk(fmt, ...) \
({ \
char ____fmt[] = fmt PRINT_SUFFIX; \
bpf_trace_printk(____fmt, sizeof(____fmt), ##__VA_ARGS__); \
})
#endif

#ifndef DEBUG
// do nothing
#define debugf(fmt, ...) ({})
#else
// only print traceing in debug mode
#ifndef debugf
#define debugf(fmt, ...) \
({ \
char ____fmt[] = "[debug] " fmt PRINT_SUFFIX; \
bpf_trace_printk(____fmt, sizeof(____fmt), ##__VA_ARGS__); \
})
#endif

#endif

static inline int is_port_listen_current_ns(void *ctx, __u16 port)
{

struct bpf_sock_tuple tuple = {};
tuple.ipv4.dport = bpf_htons(port);
struct bpf_sock *s = bpf_sk_lookup_tcp(ctx, &tuple, sizeof(tuple.ipv4),
BPF_F_CURRENT_NETNS, 0);
if (s) {
bpf_sk_release(s);
return 1;
}
return 0;
}

//存储源信息
struct origin_info {
__u32 pid;
__u32 ip;
__u16 port;
// last bit means that ip of process is detected.
__u16 flags;
};

//存储源ip 目的ip 源端口和目的端口
struct pair {
__u32 sip;
__u32 dip;
__u16 sport;
__u16 dport;
};
maps.h
1
2
3
4
5
6
7
8
9
10
11
12
13
14
15
16
17
18
19
20
21
22
23
24
25
26
27
28
29
30
31
32
33
34
35
36
37
38
39
40
41
42
43
44
45
46
47
#pragma once
#include "helpers.h"

//保存原始目的地址信息
struct bpf_map __section("maps") cookie_original_dst = {
.type = BPF_MAP_TYPE_LRU_HASH,
.key_size = sizeof(__u32),
.value_size = sizeof(struct origin_info),
.max_entries = 65535,
.map_flags = 0,
};

//保存当前节点中的pod的ip信息,将已经注入Sidecar的Pod IP地址写入local_pod_ips
struct bpf_map __section("maps") local_pod_ips = {
.type = BPF_MAP_TYPE_HASH,
.key_size = sizeof(__u32),
.value_size = sizeof(__u32),
.max_entries = 1024,
.map_flags = 0,
};

//保存envoy的ip地址
struct bpf_map __section("maps") process_ip = {
.type = BPF_MAP_TYPE_LRU_HASH,
.key_size = sizeof(__u32),
.value_size = sizeof(__u32),
.max_entries = 1024,
.map_flags = 0,
};

//保存四元组信息和对应的原始目的地址
struct bpf_map __section("maps") pair_original_dst = {
.type = BPF_MAP_TYPE_LRU_HASH,
.key_size = sizeof(struct pair),
.value_size = sizeof(struct origin_info),
.max_entries = 65535,
.map_flags = 0,
};

//保存当前sock和四元组信息
struct bpf_map __section("maps") sock_pair_map = {
.type = BPF_MAP_TYPE_SOCKHASH,
.key_size = sizeof(struct pair),
.value_size = sizeof(__u32),
.max_entries = 65535,
.map_flags = 0,
};
mb_bind.c

劫持 bind 系统调用并修改地址。目前该项目支持Istiolinkerdmb_bind.c程序会判断mesh的类型是否为linkerd,如果是会将监听地址从127.0.0.1:4140变为0.0.0.0:41404140端口是linkerd的出站流量重定向端口。

mb_connect.c中,作者为了避免四元组产生冲突,将目的地址修改为127.x.y.z而不是127.0.0.1,而在linkerd源码中是不允许修改的,如下图所示

2

针对该代码的具体细则可参考链接:https://github.com/linkerd/linkerd2-proxy/pull/1442

1
2
3
4
5
6
7
8
9
10
11
12
13
14
15
16
17
18
19
20
21
22
23
24
25
26
#include "headers/helpers.h"
#include "headers/mesh.h"
#include <linux/bpf.h>
#include <linux/in.h>

__section("cgroup/bind4") int mb_bind(struct bpf_sock_addr *ctx)
{
#if MESH != LINKERD
// only works on linkerd
return 1;
#endif

if (ctx->user_ip4 == 0x0100007f &&
ctx->user_port == bpf_htons(OUT_REDIRECT_PORT)) {
__u64 uid = bpf_get_current_uid_gid() & 0xffffffff;
if (uid == SIDECAR_USER_ID) {
printk("change bind address from 127.0.0.1:%d to 0.0.0.0:%d",
OUT_REDIRECT_PORT, OUT_REDIRECT_PORT);
ctx->user_ip4 = 0;
}
}
return 1;
}

char ____license[] __section("license") = "GPL";
int _version __section("version") = 1;
mb_connect.c

劫持connect系统调用

1
2
3
4
5
6
7
8
9
10
11
12
13
14
15
16
17
18
19
20
21
22
23
24
25
26
27
28
29
30
31
32
33
34
35
36
37
38
39
40
41
42
43
44
45
46
47
48
49
50
51
52
53
54
55
56
57
58
59
60
61
62
63
64
65
66
67
68
69
70
71
72
73
74
75
76
77
78
79
80
81
82
83
84
85
86
87
88
89
90
91
92
93
94
95
96
97
98
99
100
101
102
103
104
105
106
107
108
#include "headers/helpers.h"
#include "headers/maps.h"
#include "headers/mesh.h"
#include <linux/bpf.h>
#include <linux/in.h>

static __u32 outip = 1;

__section("cgroup/connect4") int mb_sock4_connect(struct bpf_sock_addr *ctx)
{
// init,处理TCP流量
if (ctx->protocol != IPPROTO_TCP) {
return 1;
}
__u32 pid = bpf_get_current_pid_tgid() >> 32; // tgid
__u64 uid = bpf_get_current_uid_gid() & 0xffffffff;

//判断端口是否在监听当前的netns,以istio为例,OUT_REDIRECT_PORT是15001
//如果15001端口没有监听当前ns,则绕过,只需要处理istio管理的pod间流量
if (!is_port_listen_current_ns(ctx, OUT_REDIRECT_PORT)) {
return 1;
}
//istio-proxy用户身份 uid为1337
//1.如果uid不是1337
if (uid != SIDECAR_USER_ID) {
//1.1进一步判断如果应用调用的是本地即127开头的话,则绕过
if ((ctx->user_ip4 & 0xff) == 0x7f) {
return 1;
}
//1.2.uid不是1337且应用没有调用本地
debugf("call from user container: ip: 0x%x, port: %d", ctx->user_ip4,
bpf_htons(ctx->user_port));
//需要重定向到envoy处理
__u64 cookie = bpf_get_socket_cookie_addr(ctx); //获取当前netns的cookie
//定义原始目的地址信息
struct origin_info origin = {
.ip = ctx->user_ip4,
.port = ctx->user_port,
.pid = pid,
.flags = 1,
};
//将cookie和源地址信息更新到cookie_original_dst中,更新成功返回0,失败返回负值
if (bpf_map_update_elem(&cookie_original_dst, &cookie, &origin,
BPF_ANY)) {
printk("write cookie_original_dst failed");
return 0;
}
//应用向外发起连接时,将目标地址修改为 127.x.y.z:15001
//之所以在connect时,修改目的地址为127.x.y.z而不是127.0.0.1
//是因为在不同的Pod中,可能产生冲突的四元组,使用此方式即可巧妙地避开冲突
ctx->user_ip4 = bpf_htonl(0x7f800000 | (outip++));
if (outip >> 20) {
outip = 1;
}
ctx->user_port = bpf_htons(OUT_REDIRECT_PORT);
} else { //uid=1337
//2.从envoy到其他的情况
debugf("call from sidecar container: ip: 0x%x, port: %d", ctx->user_ip4,
bpf_htons(ctx->user_port));
__u32 ip = ctx->user_ip4;
if (!bpf_map_lookup_elem(&local_pod_ips, &ip)) {
//2.1.目的ip没有在节点中,绕过
debugf("dest ip: 0x%x not in this node, bypass", ctx->user_ip4);
return 1;
}
//2.2.目的地址在当前节点,但是不在当前pod
__u64 cookie = bpf_get_socket_cookie_addr(ctx); //获取当前netns的cookie
//定义原始目的地址信息
struct origin_info origin = {
.ip = ctx->user_ip4,
.port = ctx->user_port,
.pid = pid,
};
//在process_ip中查找pid信息,process_ip中存储envoy的ip地址
void *curr_ip = bpf_map_lookup_elem(&process_ip, &pid);
//2.2.1如果存在则属于envoy到其他envoy
if (curr_ip) {
if (*(__u32 *)curr_ip != ctx->user_ip4) {
debugf("enovy to other, rewrite dst port from %d to %d",
ctx->user_port, IN_REDIRECT_PORT);
ctx->user_port = bpf_htons(IN_REDIRECT_PORT);
}
origin.flags |= 1;
} else { // 2.2.2.envoy到应用程序,不用重写
origin.flags = 0;
#ifdef USE_RECONNECT
// envoy to envoy
// try redirect to 15006
// but it may cause error if it is envoy call self pod,
// in this case, we can read src and dst ip in sockops,
// if src is equals dst, it means envoy call self pod,
// we should reject this traffic in sockops,
// envoy will create a new connection to self pod.
ctx->user_port = bpf_htons(IN_REDIRECT_PORT);
#endif
}
if (bpf_map_update_elem(&cookie_original_dst, &cookie, &origin,
BPF_NOEXIST)) {
printk("update cookie origin failed");
return 0;
}
}

return 1;
}

char ____license[] __section("license") = "GPL";
int _version __section("version") = 1;
mb_get_sockopts.c
1
2
3
4
5
6
7
8
9
10
11
12
13
14
15
16
17
18
19
20
21
22
23
24
25
26
27
28
29
30
31
32
33
34
35
36
37
38
39
40
41
42
43
44
45
46
47
48
49
50
51
52
53
54
#include "headers/helpers.h"
#include "headers/maps.h"
#include <linux/bpf.h>
#include <linux/in.h>

#define MAX_OPS_BUFF_LENGTH 4096
#define SO_ORIGINAL_DST 80 //80是ORIGINAL_DST在内核中的编号

__section("cgroup/getsockopt") int mb_get_sockopt(struct bpf_sockopt *ctx)
{
//ebpf无法处理大于4096字节的数据
if (ctx->optlen > MAX_OPS_BUFF_LENGTH) {
debugf("optname: %d, force set optlen to %d, original optlen %d is too "
"high",
ctx->optname, MAX_OPS_BUFF_LENGTH, ctx->optlen);
ctx->optlen = MAX_OPS_BUFF_LENGTH;
}
//代理把TCP连接拦截下来之后,并不知道原来的目标地址是什么,从而无法实现转发
//Envoy收到连接之后会调用getsockopt获取原始目的信息
//get_sockopts程序会根据四元组信息从pair_original_dst取出原始目的地址并返回给Envoy,由此连接完全建立
if (ctx->optname == SO_ORIGINAL_DST) {
//定义四元组结构体信息
struct pair p = {
.dip = ctx->sk->src_ip4,
.dport = bpf_htons(ctx->sk->src_port),
.sip = ctx->sk->dst_ip4,
.sport = bpf_htons(ctx->sk->dst_port),
};
//根据四元组信息从pair_original_dst取出原始目的地址并返回
struct origin_info *origin =
bpf_map_lookup_elem(&pair_original_dst, &p);
if (origin) { // 重写原始目的地址
ctx->optlen = (__s32)sizeof(struct sockaddr_in);
//边界检查
if ((void *)((struct sockaddr_in *)ctx->optval + 1) >
ctx->optval_end) {
printk("optname: %d: invalid getsockopt optval", ctx->optname);
return 1;
}
//将系统调用返回值重置为零
ctx->retval = 0;
struct sockaddr_in sa = {
.sin_family = ctx->sk->family,
.sin_addr.s_addr = origin->ip,
.sin_port = origin->port,
};
*(struct sockaddr_in *)ctx->optval = sa;
}
}
return 1;
}

char ____license[] __section("license") = "GPL";
int _version __section("version") = 1;
mb_redir.c
1
2
3
4
5
6
7
8
9
10
11
12
13
14
15
16
17
18
19
20
21
22
23
24
25
#include "headers/helpers.h"
#include "headers/maps.h"
#include <linux/bpf.h>
#include <linux/in.h>
//在socket发起 sendmsg 系统调用时触发执行
__section("sk_msg")
int mb_msg_redir(struct sk_msg_md *msg)
{
//这里的结构体就是sock_pair_map中的key
struct pair p = {
.sip = msg->local_ip4,
.sport = msg->local_port,
.dip = msg->remote_ip4,
.dport = msg->remote_port >> 16,
};
//根据四元组信息,从sock_pair_map中读取sock
//然后通过bpf_msg_redirect_hash直接转发,加速请求
long ret = bpf_msg_redirect_hash(msg, &sock_pair_map, &p, 0);
if (ret)
debugf("redirect %d bytes with eBPF successfully", msg->size);
return 1;
}

char ____license[] __section("license") = "GPL";
int _version __section("version") = 1;

bpf_msg_redirect_hash参数解析

1
bpf_msg_redirect_hash(msg, &sock_pair_map, &p, 0);
  • msg:用户可访问的待发送数据的元信息
  • sock_pair_map:这个BPF程序attach到的sockhash map
  • p:在map中索引用的key
  • 0:BPF_F_INGRESS,放到对端的哪个queue
mb_sockops.c
1
2
3
4
5
6
7
8
9
10
11
12
13
14
15
16
17
18
19
20
21
22
23
24
25
26
27
28
29
30
31
32
33
34
35
36
37
38
39
40
41
42
43
44
45
46
47
48
49
50
51
52
53
54
55
56
57
58
59
60
61
62
63
64
65
66
67
68
69
70
71
72
73
74
75
76
77
78
79
80
81
82
83
84
85
#include "headers/helpers.h"
#include "headers/maps.h"
#include "headers/mesh.h"
#include <linux/bpf.h>
#include <linux/in.h>

static inline int sockops_ipv4(struct bpf_sock_ops *skops)
{
//获取当前netns的cookie
__u64 cookie = bpf_get_socket_cookie_ops(skops);

//在cookie_original_dst查找与cookie相关的条目
void *dst = bpf_map_lookup_elem(&cookie_original_dst, &cookie);
//如果存在cookie
if (dst) {
//dd保存原始目的信息
struct origin_info dd = *(struct origin_info *)dst;
if (!(dd.flags & 1)) {
__u32 pid = dd.pid;
// 判断源IP和目的地址IP是否一致
if (skops->local_ip4 == 100663423 ||
skops->local_ip4 == skops->remote_ip4) {
//如果一致,代表发送了错误的请求
__u32 ip = skops->remote_ip4;
debugf("detected process %d's ip is %d", pid, ip);
//并将当前的ProcessID和IP信息写入process_ip这个map
bpf_map_update_elem(&process_ip, &pid, &ip, BPF_ANY);
#ifdef USE_RECONNECT
//bpf_htons:主机序到网络序
//判断远程端口是不是15006端口,如果是的话则丢弃这个连接
if (skops->remote_port >> 16 == bpf_htons(IN_REDIRECT_PORT)) {
printk("incorrect connection: cookie=%d", cookie);
return 1;
}
#endif
} else {
// envoy to envoy
__u32 ip = skops->local_ip4;
//将当前的ProcessID和IP信息写入process_ip这个map
bpf_map_update_elem(&process_ip, &pid, &ip, BPF_ANY);
debugf("detected process %d's ip is %d", pid, ip);
}
}
// get_sockopts can read pid and cookie,
// we should write a new map named pair_original_dst
struct pair p = {
.sip = skops->local_ip4,
.sport = skops->local_port,
.dip = skops->remote_ip4,
.dport = skops->remote_port >> 16,
};
//将四元组信息和对应的原始目的地址写入pair_original_dst中
bpf_map_update_elem(&pair_original_dst, &p, &dd, BPF_NOEXIST);
//将当前sock和四元组保存在sock_pair_map中
bpf_sock_hash_update(skops, &sock_pair_map, &p, BPF_NOEXIST);
}
return 0;
}

//监听socket事件
__section("sockops") int mb_sockops(struct bpf_sock_ops *skops)
{
__u32 family, op;
family = skops->family;
op = skops->op;

switch (op) {
// case BPF_SOCK_OPS_PASSIVE_ESTABLISHED_CB://被动建连
case BPF_SOCK_OPS_ACTIVE_ESTABLISHED_CB: // 主动建连
if (family == 2) { // AFI_NET, we dont include socket.h, because it may
// cause an import error.
if (sockops_ipv4(skops)) //记录socket信息到sockmap
return 1;
else
return 0;
}
break;
default:
break;
}
return 0;
}

char ____license[] __section("license") = "GPL";
int _version __section("version") = 1;

启用cgroupv2产生的问题

如何启动cgroupv2

调整grub linux内核引导参数

1
sudo vim /etc/default/grub

修改GRUB_CMDLINE_LINUXsystemd.unified_cgroup_hierarchy=1

更新grub并重启

1
2
sudo update-grub
sudo reboot

判断是否启用cgroupv2

1
2
root@ubuntu:~$ cat /sys/fs/cgroup/cgroup.controllers
cpuset cpu io memory hugetlb pids rdma

在没有启用cgroupv2时,拉取merbridge镜像之后,执行docker run指令会报如下错误

1
2
3
4
5
6
7
8
9
10
11
12
13
root@ubuntu:~# docker run -it --privileged 605389bb6641
[ -f bpf/mb_connect.c ] && make -C bpf load || make -C bpf load-from-obj
make[1]: Entering directory '/app/bpf'
Makefile:29: *** It looks like your system does not have cgroupv2 enabled, or the automatic recognition fails. Please enable cgroupv2, or specify the path of cgroupv2 manually via CGROUP2_PATH parameter.. Stop.
make[1]: Leaving directory '/app/bpf'
make[1]: Entering directory '/app/bpf'
Makefile:29: *** It looks like your system does not have cgroupv2 enabled, or the automatic recognition fails. Please enable cgroupv2, or specify the path of cgroupv2 manually via CGROUP2_PATH parameter.. Stop.
make[1]: Leaving directory '/app/bpf'
make: *** [Makefile:3: load] Error 2
panic: unexpected exit code: 2, err: exit status 2
goroutine 1 [running]:
main.main()
/app/cmd/mbctl/main.go:68 +0x725

启用cgroupv2之后,docker run执行正常,可是k8s运行yaml会失败,查看pod报错如下

1
2
3
4
5
6
7
8
9
10
11
12
13
14
15
16
17
18
19
20
21
22
23
24
25
26
27
28
29
30
31
32
33
34
35
36
37
38
39
40
41
root@ubuntu:~# kubectl get pods -n istio-system
NAME READY STATUS RESTARTS AGE
istio-egressgateway-79bb75fcf9-lttmn 1/1 Running 1 3h10m
istio-ingressgateway-84bfcfd895-p4wbx 1/1 Running 1 3h10m
istiod-6c5cfd79db-vqvws 1/1 Running 1 3h12m
merbridge-9dhf2 0/1 Error 1 (15s ago) 23s
root@ubuntu:~# kubectl logs merbridge-9dhf2 -n istio-system
[ -f bpf/mb_connect.c ] && make -C bpf load || make -C bpf load-from-obj
make[1]: Entering directory '/app/bpf'
clang -O2 -g -Wall -target bpf -I/usr/include/x86_64-linux-gnu -DMESH=1 -DUSE_RECONNECT -c mb_connect.c -o mb_connect.o
clang -O2 -g -Wall -target bpf -I/usr/include/x86_64-linux-gnu -DMESH=1 -DUSE_RECONNECT -c mb_get_sockopts.c -o mb_get_sockopts.o
clang -O2 -g -Wall -target bpf -I/usr/include/x86_64-linux-gnu -DMESH=1 -DUSE_RECONNECT -c mb_redir.c -o mb_redir.o
clang -O2 -g -Wall -target bpf -I/usr/include/x86_64-linux-gnu -DMESH=1 -DUSE_RECONNECT -c mb_sockops.c -o mb_sockops.o
clang -O2 -g -Wall -target bpf -I/usr/include/x86_64-linux-gnu -DMESH=1 -DUSE_RECONNECT -c mb_bind.c -o mb_bind.o
[ -f /sys/fs/bpf/cookie_original_dst ] || sudo bpftool map create /sys/fs/bpf/cookie_original_dst type lru_hash key 4 value 12 entries 65535 name cookie_original_dst
[ -f /sys/fs/bpf/local_pod_ips ] || sudo bpftool map create /sys/fs/bpf/local_pod_ips type hash key 4 value 4 entries 1024 name local_pod_ips
[ -f /sys/fs/bpf/process_ip ] || sudo bpftool map create /sys/fs/bpf/process_ip type lru_hash key 4 value 4 entries 1024 name process_ip
sudo bpftool prog load mb_connect.o /sys/fs/bpf/connect \
map name cookie_original_dst pinned /sys/fs/bpf/cookie_original_dst \
map name local_pod_ips pinned /sys/fs/bpf/local_pod_ips \
map name process_ip pinned /sys/fs/bpf/process_ip
sudo bpftool cgroup attach /sys/fs/cgroup /sys/fs/cgroup/unified connect4 pinned /sys/fs/bpf/connect
Error: invalid attach type
make[1]: *** [Makefile:90: load-connect] Error 255
make[1]: Leaving directory '/app/bpf'
make[1]: Entering directory '/app/bpf'
[ -f /sys/fs/bpf/cookie_original_dst ] || sudo bpftool map create /sys/fs/bpf/cookie_original_dst type lru_hash key 4 value 12 entries 65535 name cookie_original_dst
[ -f /sys/fs/bpf/local_pod_ips ] || sudo bpftool map create /sys/fs/bpf/local_pod_ips type hash key 4 value 4 entries 1024 name local_pod_ips
[ -f /sys/fs/bpf/process_ip ] || sudo bpftool map create /sys/fs/bpf/process_ip type lru_hash key 4 value 4 entries 1024 name process_ip
sudo bpftool prog load mb_connect.o /sys/fs/bpf/connect \
map name cookie_original_dst pinned /sys/fs/bpf/cookie_original_dst \
map name local_pod_ips pinned /sys/fs/bpf/local_pod_ips \
map name process_ip pinned /sys/fs/bpf/process_ip
Error: failed to pin program cgroup/connect4
make[1]: *** [Makefile:89: load-connect] Error 255
make[1]: Leaving directory '/app/bpf'
make: *** [Makefile:3: load] Error 2
panic: unexpected exit code: 2, err: exit status 2
goroutine 1 [running]:
main.main()
/app/cmd/mbctl/main.go:68 +0x725

最后发现,cgroup v2 是单一层级树,因此只有一个挂载点即/sys/fs/cgroup/unified

https://github.com/merbridge/merbridge/issues/60

iptables注入解析

查看productpage pod的istio-proxy容器中的进程

1
2
3
4
root@ubuntu:~# docker top `docker ps|grep "istio-proxy_productpage"|cut -d " " -f1`
UID PID PPID C STIME TTY TIME CMD
1337 9391 9369 0 Feb16 ? 00:03:14 /usr/local/bin/pilot-agent proxy sidecar --domain default.svc.cluster.local --proxyLogLevel=warning --proxyComponentLogLevel=misc:error --log_output_level=default:info --concurrency 2
1337 10017 9391 0 Feb16 ? 00:18:42 /usr/local/bin/envoy -c etc/istio/proxy/envoy-rev0.json --restart-epoch 0 --drain-time-s 45 --drain-strategy immediate --parent-shutdown-time-s 60 --local-address-ip-version v4 --bootstrap-version 3 --file-flush-interval-msec 1000 --disable-hot-restart --log-format %Y-%m-%dT%T.%fZ?%l?envoy %n?%v -l warning --component-log-level misc:error --concurrency 2

nsenter进入sidecar容器的命名空间

1
root@ubuntu:~# nsenter -n --target 9391

在该进程的命名空间下查看其 iptables 规则链

1
2
3
4
5
6
7
8
9
10
11
12
13
14
15
16
17
18
19
20
21
22
23
24
25
26
27
28
29
30
31
32
33
34
35
36
37
38
39
40
41
42
43
44
45
#查看NAT表中规则配置的详细信息
root@ubuntu:~# iptables -t nat -L -v
#PREROUTING链:用于目标地址转换,将所有入站TCP流量跳转到ISTIO_INBOUND链上
Chain PREROUTING (policy ACCEPT 215K packets, 13M bytes)
pkts bytes target prot opt in out source destination
216K 13M ISTIO_INBOUND tcp -- any any anywhere anywhere
#INPUT链:处理输入数据包,非TCP流量将继续走OUTPUT链
Chain INPUT (policy ACCEPT 216K packets, 13M bytes)
pkts bytes target prot opt in out source destination
#OUTPUT链:将所有出站数据包跳转到ISTIO_OUTPUT链上
Chain OUTPUT (policy ACCEPT 25827 packets, 2191K bytes)
pkts bytes target prot opt in out source destination
7274 436K ISTIO_OUTPUT tcp -- any any anywhere anywhere
#POSTROUTING链:所有数据包流出网卡时都要先进入POSTROUTING链,内核根据数据包目的地判断是否转发
Chain POSTROUTING (policy ACCEPT 29847 packets, 2432K bytes)
pkts bytes target prot opt in out source destination
#ISTIO_INBOUND链:将所有入站流量重定向到ISTIO_IN_REDIRECT链上
Chain ISTIO_INBOUND (1 references)
pkts bytes target prot opt in out source destination
0 0 RETURN tcp -- any any anywhere anywhere tcp dpt:15008
0 0 RETURN tcp -- any any anywhere anywhere tcp dpt:ssh
0 0 RETURN tcp -- any any anywhere anywhere tcp dpt:15090
215K 13M RETURN tcp -- any any anywhere anywhere tcp dpt:15021
0 0 RETURN tcp -- any any anywhere anywhere tcp dpt:15020
1256 75360 ISTIO_IN_REDIRECT tcp -- any any anywhere anywhere
#ISTIO_IN_REDIRECT链:将所有的入站流量跳转到本地的15006端口,至此成功的拦截了流量到sidecar中
Chain ISTIO_IN_REDIRECT (3 references)
pkts bytes target prot opt in out source destination
1256 75360 REDIRECT tcp -- any any anywhere anywhere redir ports 15006
#ISTIO_OUTPUT链:选择需要重定向到Envoy(即本地) 的出站流量
Chain ISTIO_OUTPUT (1 references)
pkts bytes target prot opt in out source destination
2479 149K RETURN all -- any lo 127.0.0.6 anywhere
0 0 ISTIO_IN_REDIRECT all -- any lo anywhere !localhost owner UID match 1337
0 0 RETURN all -- any lo anywhere anywhere ! owner UID match 1337
775 46500 RETURN all -- any any anywhere anywhere owner UID match 1337
0 0 ISTIO_IN_REDIRECT all -- any lo anywhere !localhost owner GID match 1337
0 0 RETURN all -- any lo anywhere anywhere ! owner GID match 1337
0 0 RETURN all -- any any anywhere anywhere owner GID match 1337
0 0 RETURN all -- any any anywhere localhost
4020 241K ISTIO_REDIRECT all -- any any anywhere anywhere
#ISTIO_REDIRECT链:将所有流量重定向到Sidecar(即本地)的15001端口
Chain ISTIO_REDIRECT (1 references)
pkts bytes target prot opt in out source destination
4020 241K REDIRECT tcp -- any any anywhere anywhere redir ports 15001

参考